

Table of Contents
- What You'll Need Before You Rearrange a Gondola Bay
- The Golden Zone: Gondola Shelf Spacing Best Practices
- Retail Merchandising Techniques That Lift Gondola Sales
- How to Improve Retail Store Layout Around Your Gondola Runs
- How to Arrange Gondola Shelves for Sales: A Step-by-Step Sequence
- Gondola End Panels and Focal Points That Stop Shoppers
- Common Gondola Merchandising Mistakes to Avoid
- Conclusion
- Frequently Asked Questions
Last Updated: September 12, 2026
What You'll Need Before You Rearrange a Gondola Bay
Arranging gondola shelves for sales starts with a clear plan, not a cleared shelf. Pull the bay's current sales data, measure the unit, and decide what the display must achieve before you move a single bracket.
Here's what to gather first:
- Sales and margin data for every line in the bay, ranked by units sold and profit per facing
- A tape measure and a note of your gondola's bay width and upright height
- Shelf count and depth: base shelves, upper shelves, and any dividers or fences
- Cleaning cloths and a bin bag for expired stock and dust
- A planogram sketch, even a rough one on paper, so the rebuild has a target
- Labels and POS signage ordered ahead of the rebuild
Store Fittings Direct has supplied shop fixtures for over 30 years, and the most common mistake we see is a retailer rebuilding a bay without knowing which products actually earn their space.
The Golden Zone: Gondola Shelf Spacing Best Practices
The golden zone is the band of shelving between roughly hip and eye level, and it is where your highest-margin products belong. On a standard 2.1m gondola upright, treat the middle two or three shelves as prime selling space and reserve the top and bottom tiers for bulk, backup, or browsing stock.
Gondola shelf spacing best practices come down to three rules:
- Keep the base shelf deep (typically 470mm) for bulky or heavy lines that shoppers won't lift to eye level (bsigroup.com).
- Set upper shelves at 370mm depth so the bay doesn't feel top-heavy and sightlines into the next aisle stay open (bsigroup.com).
- Leave a clear gap between the top of the stock and the shelf above it so shoppers can reach in without knocking items over.
Deciding Shelf Heights for Base, Middle and Top Tiers
Base tier: heavy, bulky, and high-volume lines. Middle tiers: your profit drivers and impulse picks. Top tier: slow movers, backup stock, or display-only items.
If a product can't be reached comfortably by an average adult standing square to the bay, it isn't going to sell from that position. Move it.
Retail Merchandising Techniques That Lift Gondola Sales
Retail merchandising techniques only work when they respect how people actually shop: in glances, not in study. A shopper walking an aisle scans the bay in seconds, so the layout has to do the explaining.
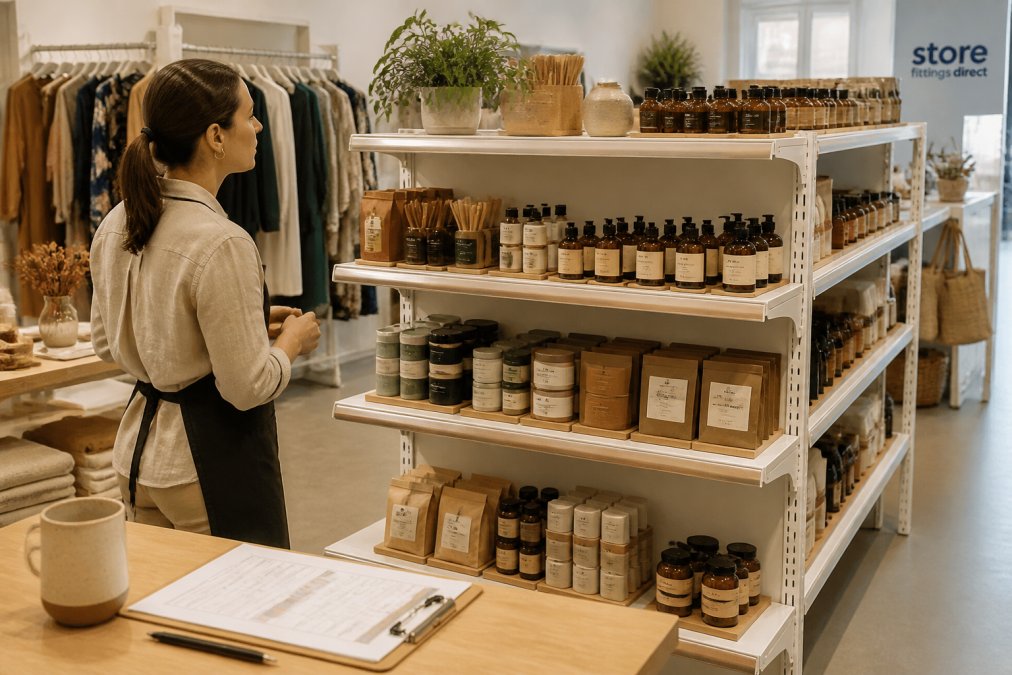
Three techniques carry most of the weight:
- Block colour and brand together so the eye reads the bay as organised zones rather than a jumble.
- Face products forward and pull them to the shelf edge, never leave a gap at the front.
- Cross-merchandise related items at the point of decision, not in a separate aisle.
Grouping Products by Mission, Not Just Category
Most retailers group by category. Shoppers group by mission. Someone buying pasta sauce is also buying pasta, and quite possibly a bottle of wine. Building a "weeknight dinner" block sells more than three tidy category blocks ever will.
The test is simple: if a shopper has to walk to a different bay to complete one task, you've split a mission and lost a sale.
How to Improve Retail Store Layout Around Your Gondola Runs
Improving retail store layout around gondola runs is mostly about the aisle, not the shelf. A gondola bay can be perfectly merchandised and still fail if the aisle in front of it is too tight, too wide, or too cluttered to walk comfortably.
Aim for a main aisle wide enough for two shoppers to pass with a trolley or basket, and keep secondary aisles tight enough that the bay opposite stays in peripheral vision (gov.uk). Place your highest-traffic categories at the far end of the run so shoppers pass the whole bay on the way, and put destination categories at the entrance to the run rather than the middle.
Keep the run itself clean. Trolleys, promotional bins, and stock cages parked in the aisle kill the sightline you just built.
How to Arrange Gondola Shelves for Sales: A Step-by-Step Sequence
Arranging gondola shelves for sales follows a fixed sequence: strip the bay, clean it, set the heights, load from the bottom up, then face and label. Work in that order and you won't rebuild twice.
Total time: 2-3 hours per bay Difficulty: Beginner
- Clear the bay completely. Remove all stock and note which lines are being delisted.
- Clean the shelves, back panels, and uprights. A dusty bay undermines every product on it.
- Set your shelf heights using the golden zone as your guide, base deep, uppers shallower.
- Load the base shelf first with heavy and bulky lines.
- Build the middle tiers with your highest-margin products, grouped by mission.
- Fill the top tier with backup stock and slow movers.
- Face every product forward and pull it to the shelf edge.
- Add labels and POS signage, then step back and check the bay from the aisle.
Expected result: a bay that reads clearly from six paces away and puts your best-margin lines at eye level.
Gondola End Panels and Focal Points That Stop Shoppers
An end panel is the single highest-value piece of real estate on a gondola run, because it faces the shopper walking towards the aisle rather than alongside it. Treat it as a display, not as overflow storage.
The Plain Gondola End Panel gives a clean, finished face for a feature display, while the Slatwall Gondola End Panel adds hanging capacity for accessories and impulse lines. Both attach to the gondola post with supplied brackets, so no extra feet or support structure is needed.


Change the end panel display on a regular cycle. A static end panel stops being a focal point within a fortnight and becomes wallpaper.
Common Gondola Merchandising Mistakes to Avoid
| Mistake | Why it costs sales | The fix |
|---|---|---|
| Grouping by category only | Shoppers can't complete a task in one stop | Group by mission instead |
| Stock pushed to the back of the shelf | Products look out of stock | Pull every facing to the shelf edge |
| Top-heavy bay | Shoppers can't reach or see the middle | Keep uppers shallower than the base |
| Static end panel | It stops being noticed | Rotate the display regularly |
| Aisle blocked by bins or cages | Sightlines and flow both break | Keep the run clear |
Most of these are cheap to fix and expensive to ignore. The bay itself is rarely the problem; the discipline around it usually is.
Conclusion
A gondola bay that sells is the product of measurement, sequence, and a bit of honesty about which lines deserve the golden zone. Get the shelf heights right, group by mission, and keep the aisle clear, and the layout does the selling for you.
Store Fittings Direct supplies gondola bays, end panels, and the fixtures that finish a run properly, backed by over 30 years of experience, over 1.3 million products sold, a Price Match Promise, and trade accounts with 30 days interest-free credit. Get started with Store Fittings Direct and build a bay that earns its floor space.
Frequently Asked Questions
What is the best height for gondola shelves to increase sales?
Shoppers scan between roughly 120cm and 160cm, so place bestsellers and higher-margin lines at that eye-level band. Keep heavy or bulky items on the base shelf, which also improves stability, and reserve the top tier for lighter stock or signage. A 2.1m bay with a 470mm base shelf and adjustable uppers lets you shift positions without buying new parts. Review heights each season as product sizes change. For most independent shops, adjusting just the middle two shelves delivers the biggest visible gain.
How do I create a focal point on a gondola display?
Use the end panel as your focal point. A slatwall gondola end panel gives you a surface for hanging products, hooks and seasonal signage, while a plain end panel suits a cleaner, colour-blocked look. Keep one hero product or one tight theme per end, change it every few weeks, and light it if you can. End panels also stop stock sliding off the run. Pair the focal point with a matching shelf-edge message so the eye travels from the end into the aisle.
What are the best practices for gondola shelf spacing?
Leave enough clearance above each product for a hand to reach in and lift it out, and avoid gaps so wide that small items look lost. Group similar pack sizes on the same shelf so the run reads as blocks rather than a patchwork. Keep the top shelf shallow in depth and the base shelf deepest. Spacing should follow pack dimensions, not a fixed measurement, so measure your tallest and shortest lines before you set positions. Recheck spacing whenever you add a new product size.
Should I use shelf talkers to improve gondola sales?
Shelf talkers work when they answer a question the shopper already has, such as price, size, ingredients or a promotion deadline. Too many and the run looks cluttered, so limit them to one per product block. Place them on the shelf edge directly below the product, keep the wording to a short line, and remove them the day the offer ends. Combine shelf talkers with a consistent product grouping so the message and the display reinforce each other rather than competing.


