

Table of Contents
- Where Timber Bollards Are Used
- Tools and Materials You Need Before Installing Timber Bollards
- Timber Bollard Installation Depth: Getting It Right First Time
- Step-by-Step Installation Guide for Timber Bollards
- Best Wood Treatment for Outdoor Bollards
- Timber Bollard Maintenance Schedule: What to Do and When
- Common Mistakes to Avoid When Installing Timber Bollards
- Frequently Asked Questions
Last Updated: 31 August 2026
Timber bollards are deceptively simple site features that most people underestimate until installation goes wrong. At Store Fittings Direct, we supply solid oak timber bollards to councils, schools, garden centres, and commercial sites across the country. This guide covers everything a first-time installer needs to know: where timber bollards work best, how deep to set them, the step-by-step process, and how to maintain them for years.

Timber Bollards | Solid oak with pyramid top
Get the installation right and a timber bollard will stand firm for a decade or more. Get it wrong and you will be re-digging that hole within a season.
Where Timber Bollards Are Used
Timber bollards are upright wooden posts set into the ground to separate, guide, or protect spaces without the harsh visual impact of metal or concrete alternatives. Their natural appearance makes them the preferred choice wherever the surroundings call for something understated.
Common applications include playing fields and sports grounds, country parks and nature reserves, ornamental gardens and estate grounds, school and college campuses, retail parks and garden centres, and private driveways and rural properties. The common thread is environments where a natural look matters. Hardwood oak blends into green and landscaped settings in a way that galvanised steel simply cannot. According to guidance on street furniture design from the Design Council, materials that reflect the surrounding environment consistently improve how people perceive and use public spaces.
One thing to note before you choose: timber bollards are pedestrian management and light vehicle deterrent tools. They are not rated as security barriers against deliberate vehicle impact. If your site has that kind of risk, a steel or concrete option is the right call.
Tools and Materials You Need Before Installing Timber Bollards
Poor preparation is the single biggest cause of a botched bollard installation. Gather everything before you start to avoid frustrating mid-installation discoveries.
Tools:
- Post hole digger or auger (hire a mechanical auger for more than five bollards)
- Spade and shovel
- Spirit level
- Rubber mallet or post driver
- Tape measure and string line
- Marker paint or pegs for positioning
- Mixing bucket or wheelbarrow
Materials:
- Timber bollards (sized to your specification)
- Concrete mix or postcrete (fast-set is easiest for small installations)
- Gravel or hardcore for drainage at the base
- Water
- Wood preservative or UV protective oil for post-installation treatment
- Gloves and eye protection
For the bollards themselves, Store Fittings Direct offers solid oak options including the Solid Oak Timber Bollard with Pyramid Top, the Solid Oak Timber Bollard with Flat Top Finish, and the Solid Oak Timber Bollard with Backweather Top Finish. The top finish is largely an aesthetic choice; the installation process is identical across all three.


Timber Bollard Installation Depth: Getting It Right First Time
Timber bollard installation depth is the detail most first-timers get wrong. The rule of thumb used across groundworks and fencing is to bury one third of the total post length underground. So a 1.2-metre bollard needs approximately 400mm in the ground; a 1.5-metre bollard needs around 500mm.
This ratio exists for a good reason. A shallow set creates a lever arm: any lateral force applied at the top of the post is amplified at the base. The shallower the burial, the more that force rocks the post, and eventually the concrete or compacted backfill fails.
Factors that affect the depth you should use include soil type (sandy or loose soils require deeper setting than firm clay), exposure (high-footfall areas need more depth than sheltered locations), and post diameter (thicker posts have more surface area in contact with the ground). As the Timber Research and Development Association's guidance on timber in construction notes, correct embedment depth is one of the most significant factors in long-term performance of any timber post installation.
A common mistake is assuming a concrete collar alone compensates for insufficient depth. It does not. Concrete improves the hold, but only if there is enough post length underground to resist movement in the first place.
Bollard Total Length |
Minimum Burial Depth |
Minimum Concrete Collar Depth |
|---|---|---|
900mm |
300mm |
200mm |
1200mm |
400mm |
250mm |
1500mm |
500mm |
300mm |
1800mm |
600mm |
350mm |
Step-by-Step Installation Guide for Timber Bollards
Installing timber bollards correctly takes patience more than skill. Follow these steps in order and the result will be solid, level, and long-lasting.

A person digging a post hole in a gravel path outdoors using a manual post auger, with a solid oak timber bollard with pyramid top lying on the ground nearby ready for installation, photographed in natural daylight
Step 1: Mark Out Your Bollard Positions
Before any digging begins, establish exactly where each bollard will sit. Use a string line to create a straight reference between your start and end points, then mark each bollard position with marker paint or a wooden peg. Measure the spacing between positions carefully; uneven spacing is immediately obvious once the bollards are in.
Check for underground services before you dig. Contact your utility provider or use a cable avoidance tool (CAT scanner) to confirm the area is clear. The Health and Safety Executive's guidance on safe digging practice is clear that striking a buried cable or pipe is a serious safety risk.
Step 2: Dig the Hole and Prepare the Base
Dig each hole to your target depth plus an additional 75-100mm for a drainage layer at the bottom. The hole diameter should be roughly three times the bollard diameter to allow room for concrete.
Once at depth, pour in 75-100mm of gravel or hardcore and compact it firmly. This drainage layer prevents water from pooling directly beneath the post end, which is the primary cause of premature rot in timber bollards.
Step 3: Set and Secure the Bollard
Lower the bollard into the hole and check it is plumb (perfectly vertical) using a spirit level on two adjacent faces. Pour in your concrete mix around the post in layers, tamping each layer down with a rod or stick to eliminate air pockets. Build the concrete up to within 50mm of the ground surface, sloping the top slightly away from the post so rainwater drains outward.
Hold the bollard plumb while the concrete achieves initial set. Fast-set postcrete typically firms up within 10-15 minutes, but do not apply any lateral force for at least an hour.
Step 4: Backfill and Finish
Once the concrete has cured (allow at least 24 hours for full strength), backfill any remaining gap at the surface with compacted soil or gravel. Tamp it down firmly and check the bollard is still plumb after backfilling.
Clean any concrete splatter from the timber surface immediately with a damp cloth. Apply your chosen wood treatment at this stage before the timber has a chance to weather.
Best Wood Treatment for Outdoor Bollards
The best wood treatment for outdoor bollards is a penetrating oil or preservative that protects from the inside out, rather than a surface film that sits on top and eventually peels. Oak is naturally durable, but untreated outdoor oak will still grey, crack, and eventually degrade when exposed to UV light and repeated wetting and drying cycles.
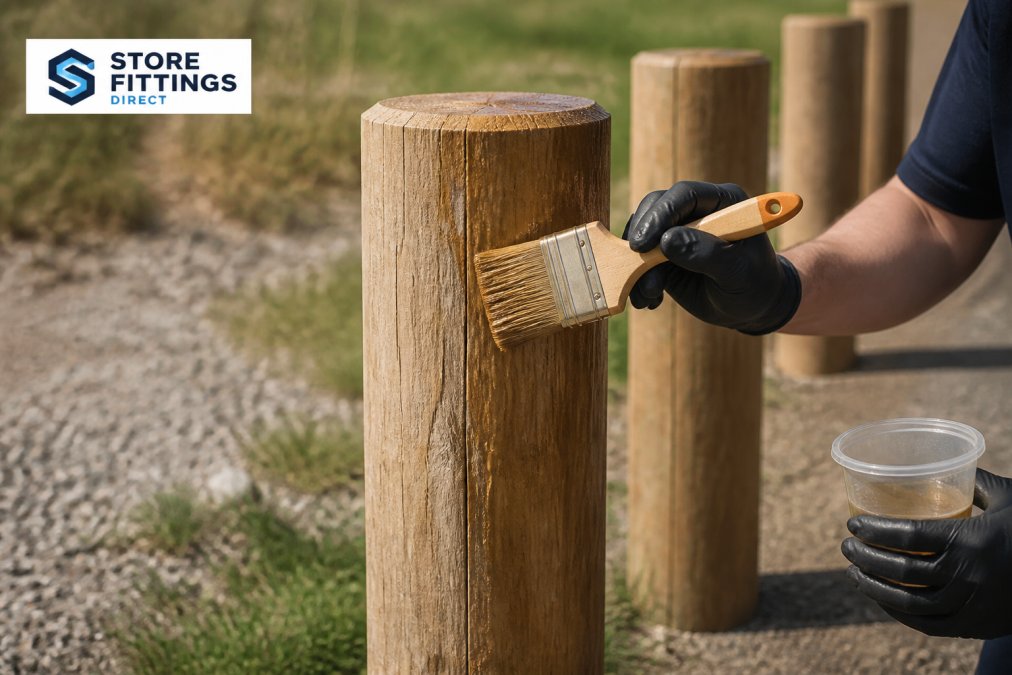
Close-up of a person applying clear UV protective oil to the surface of a solid oak timber bollard using a wide paintbrush, outdoors on a sunny day with the grain of the oak clearly visible
For solid oak bollards specifically, a UV-protective oil is the most effective option. Store Fittings Direct stocks Treatex UV Oil - Clear UV Protective Timber Finish, which is engineered to block the ultraviolet rays that cause bleaching and surface degradation. It penetrates the timber rather than coating it, meaning it does not crack, flake, or trap moisture beneath the surface.
Application is straightforward: ensure the timber surface is clean and dry, apply the oil generously with a brush or cloth working with the grain, allow 30 minutes for initial absorption, wipe off any excess, and allow to cure fully before the bollard is exposed to rain (typically 24 hours).
Pay particular attention to the end grain at the top of the bollard. End grain absorbs water far more readily than face grain, and the top of a bollard takes the most direct rainfall.
Timber Bollard Maintenance Schedule: What to Do and When
A timber bollard maintenance schedule does not need to be complicated. The goal is to catch problems early and reapply protection before the timber is left exposed.
Frequency |
Task |
|---|---|
Monthly |
Visual inspection: check for leaning, cracking, or signs of impact damage |
Every 6 months |
Check ground level for soil subsidence around the base; re-tamp if needed |
Annually (spring) |
Clean the surface, sand lightly if needed, reapply UV oil or preservative |
Every 3-5 years |
Inspect the buried section if any instability is detected; re-concrete if required |
As needed |
Replace any bollard showing deep cracking, splitting at the base, or significant rot |
The spring application of oil is the most important single maintenance task. Winter moisture followed by UV exposure in spring is the combination most likely to degrade unprotected timber. Getting the oil on before the summer sun arrives makes a measurable difference to how long the surface holds up.
Cleaning before treatment matters too. Algae, moss, and dirt all reduce how well the oil penetrates. A stiff brush and a mild detergent wash, followed by a thorough rinse and drying time, gives the best result. According to guidance on timber durability and maintenance from the Wood Information Service, regular maintenance of treated hardwood can extend service life significantly compared with untreated or neglected timber.
Common Mistakes to Avoid When Installing Timber Bollards
Most installation problems are predictable and avoidable.
Setting the bollard too shallow. The one-third rule exists because it works. Cutting corners on depth means the bollard will rock within a year, especially in softer ground.
Skipping the drainage layer. A bollard sitting directly on compacted soil at the base will hold water against the end grain. Rot starts from the bottom up, and by the time you see surface signs, the structural damage is already significant.
Not checking for plumb before the concrete sets. A bollard that leans even slightly looks wrong immediately. Check with a spirit level on two faces and hold the post in position until the concrete has firmed.
Applying treatment to wet or dirty timber. Oil and preservatives need clean, dry timber to penetrate properly. Applying to a damp or dirty surface reduces the protection significantly.
Ignoring the top of the post. The end grain at the top of the bollard is the most vulnerable point. Treat the sides and the cut end thoroughly.
Over-spacing or uneven spacing. Mark positions carefully before digging using a string line. Uneven bollard spacing is immediately obvious once installed.
Using the wrong concrete mix ratio. Too wet a mix shrinks as it cures, creating gaps between the concrete and the post. Follow the manufacturer's instructions on water ratio precisely.
Timber bollards are a straightforward, cost-effective way to define and protect outdoor spaces, but they need to be installed and maintained correctly to perform well over time. Store Fittings Direct has supplied solid oak bollards to schools, councils, garden centres, and commercial sites for over 30 years, and our range includes pyramid top, flat top, and backweather top profiles to suit different settings. Pair them with Treatex UV Oil for a complete installation that will hold up season after season. View details on our full timber bollard range and order online with fast nationwide delivery.
Frequently Asked Questions
How deep should a timber bollard be buried?
As a general rule, bury at least one third of the bollard's total length below ground. For a standard 900mm above-ground height, that means digging to roughly 300mm. In softer soils or high-traffic areas, going slightly deeper and setting the base in concrete will significantly improve stability. Always check that the buried section sits clear of standing water to slow the onset of rot.
Do timber bollards require regular maintenance?
Yes. Timber bollards need inspection at least twice a year, ideally in spring and autumn. Check for cracking, splitting, or any sign of rot at the base where the wood meets soil. Reapply a quality UV-protective timber oil annually to protect against sun bleaching and moisture ingress. Catching small issues early, such as surface checking or loose concrete around the base, prevents more costly replacements down the line.
How do I prevent rot in outdoor timber bollards?
Start with a quality hardwood such as solid oak, which has natural resistance to decay. Treat all surfaces, including the buried section, with a preservative before installation. Apply a clear UV oil annually to above-ground surfaces to repel moisture. Ensure the base hole drains freely by adding a layer of compacted gravel before setting the bollard. Avoid trapping organic debris around the base, as this holds moisture and accelerates decay.
Can timber bollards be installed on concrete surfaces?
Yes, though the method differs from in-ground installation. Surface-mounted bolt-down flanges or steel core sleeves set into drilled concrete provide a secure fixing. This approach suits hard-standing areas such as car parks or paved pedestrian zones. The bollard itself remains fully visible above the surface, so choose a top finish, such as pyramid or flat top, that suits the surrounding environment and the look you want to achieve.
This article was written using GrandRanker


