

Table of Contents
- What You'll Need Before You Install Shopping Trolley Bays
- Step 1: Choose the Right Location and Size Your Shopping Trolley Bays
- Step 2: Prepare the Ground and Base
- Step 3: Trolley Shelter Ground Fixing Methods Explained
- Step 4: Bollard Installation for Trolley Bays
- Trolley Bay Installation Regulations You Need to Check
- Common Mistakes to Avoid When Installing Shopping Trolley Bays
- Frequently Asked Questions
Last Updated: 15 September 2026
What You'll Need Before You Install Shopping Trolley Bays
A shopping trolley bay is a dedicated, sheltered parking area that keeps trolley fleets contained, protected from weather and close to the store entrance. Installing shopping trolley bays properly comes down to four things: the right site, a level base, the correct ground fixing, and protection from vehicle impact. Get any of those wrong and you'll be repairing the shelter within a season.

This guide from Store Fittings Direct walks through each stage in order, based on over 30 years of supplying retail fixtures and site protection equipment.
Tools, Fixings and Site Checks
Before you order anything, confirm what's already on site. A common mistake is buying the shelter first and discovering the ground won't take the fixings.
- Cordless SDS drill with masonry bits
- Spirit level (1m minimum)
- Tape measure and marking paint
- Torque wrench and socket set
- Concrete anchor bolts or ground screws (specified by shelter type)
- Post hole digger or auger if using concrete footings
- PPE: gloves, safety glasses, hi-vis
Site checks matter just as much as the tools. Confirm there are no buried services by checking utility drawings before you drill, verify the ground is firm and free-draining, and measure the trolley fleet so the bay is sized to the fleet rather than the other way round. If the bay sits on a route used by delivery vehicles, plan for impact protection from the outset.
Step 1: Choose the Right Location and Size Your Shopping Trolley Bays
Position the bay where customers naturally abandon trolleys: within sight of the entrance, on the main pedestrian route, and on a surface that drains. Bays placed out of sight get ignored, and ignored bays mean trolleys scattered across the car park.
Size the bay to your fleet. As a working rule, allow roughly one trolley space per 0.5 metres of shelter width, then add a turning allowance at each end so customers can pull a trolley out without clipping the frame. Measure your largest trolley type, not the average one.

Check the ground before committing. Sloping or soft ground will need preparation before any fixing goes in.
Step 2: Prepare the Ground and Base
The base determines how long the shelter lasts. A trolley shelter fixed to an uneven or poorly compacted surface will work loose, and loose fixings are the single most common cause of shelter failure.
Mark out the footprint, then clear the area of debris and vegetation. For a hardstanding base, the surface should be level to within a few millimetres across the full footprint and sound enough to take anchor fixings. For soft ground, excavate and lay a compacted sub-base, then either pour concrete footings or use ground screws rated for the load.
Leave the base to cure fully before fixing. Drilling into green concrete is a fast route to cracked footings and a shelter that never sits true.
Step 3: Trolley Shelter Ground Fixing Methods Explained
There are three main fixing methods, and the right one depends entirely on your surface.
Concrete anchor bolts suit existing hardstanding. Drill through the shelter's base plates into the concrete, then torque the anchors to the manufacturer's specification. This is the fastest method and the easiest to inspect later.
Ground screws work where you have soil or gravel and want to avoid excavation. They're driven to depth and the shelter bolts to the screw heads above ground.
Concrete footings are the most permanent option. Posts are set into poured concrete, which suits exposed sites and larger shelters.
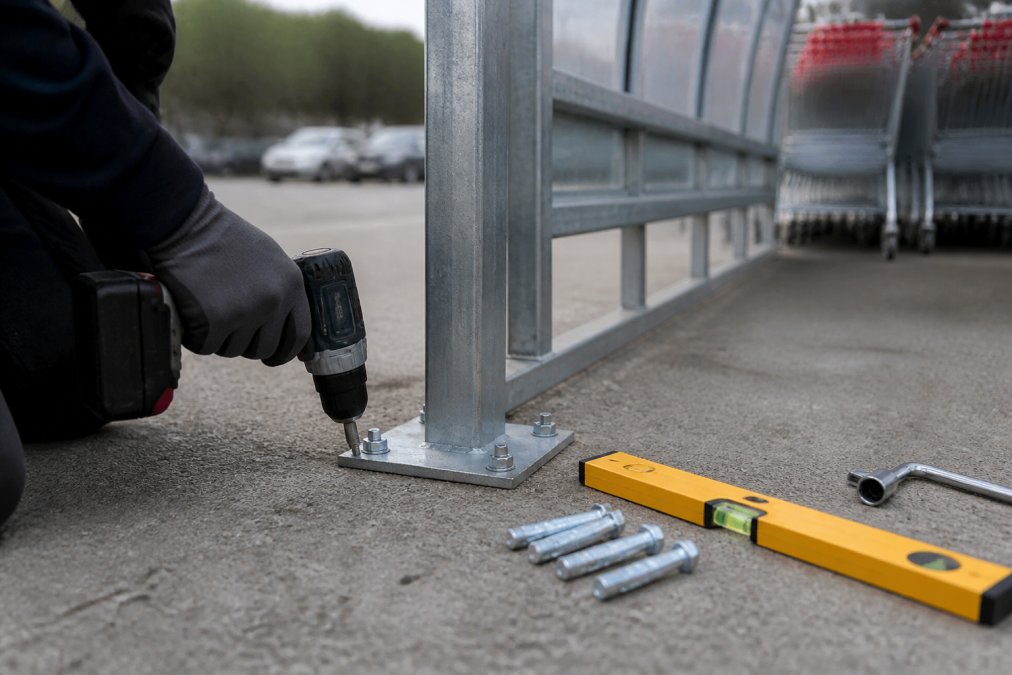
Whichever method you choose, fix all base plates before fully tightening any single one. Tightening as you go pulls the frame out of square, and you'll fight it for the rest of the install.
Step 4: Bollard Installation for Trolley Bays
Bollards protect the shelter from vehicle impact, and they're the step most installers skip. A shelter hit by a reversing car is an insurance claim and a safety hazard. Bollards are cheap by comparison.
Position bollards on the vehicle-facing side of the bay, set back far enough that a trolley can still be pushed in and out comfortably. Spacing should block vehicle access without blocking pedestrian movement.
Installation follows the same logic as the shelter: mark positions, check for buried services, then fix into concrete or set into footings. For trolley bay protection, steel core bollards set into concrete give the best balance of impact resistance and low maintenance.
Trolley Bay Installation Regulations You Need to Check
Trolley bay installation regulations are not covered by a single piece of legislation, which surprises most people. Compliance comes from several overlapping sources, and which ones apply depends on your site.
Planning permission is the first check. Shelters and bollards on private land often fall within permitted development, but sites in conservation areas, near listed buildings, or with existing planning conditions may need consent. Confirm with your local planning authority before ordering.
Health and safety duties apply throughout. Under the Health and Safety at Work etc. Act 1974, you must ensure the installation is safe for staff and customers, which in practice means checking for buried services, using competent installers, and keeping the area secure during works. The Health and Safety Executive guidance on safe site work sets out the general duties that apply.
If the site is publicly accessible, consider accessibility. The Equality Act 2010 guidance from the Equality and Human Rights Commission requires that facilities don't disadvantage disabled users, so keep pedestrian routes around the bay clear and level.
Finally, check your insurance policy. Insurers increasingly ask for evidence that trolley shelters and bollards are properly fixed, and a poorly anchored shelter can affect a claim.
Common Mistakes to Avoid When Installing Shopping Trolley Bays
Ordering the shelter before checking the ground is the most expensive mistake. If the surface won't take the intended fixings, you're either paying for excavation or returning the shelter.
Skipping bollards is the second. Shelters are designed to hold trolleys, not to absorb vehicle impacts, and replacing a bent frame costs far more than protection would have.
The third is under-sizing the bay. A shelter that's too small means trolleys park outside it, which defeats the purpose entirely. Measure the fleet, add turning space, then order.
Store Fittings Direct supplies trolley shelters in galvanised, corrosion-resistant steel, with options including roll-back safety strips and hitch rails for theft prevention. The British Standards Institution publishes the product standards that reputable shelter manufacturers work to, which is worth checking when comparing specifications.
Trolley bay installation rewards planning more than speed. Get the base right, match the fixing method to the surface, and protect the shelter from vehicles, and the bay will hold up for years rather than seasons. Store Fittings Direct stocks trolley shelters with free delivery, optional installation, and hitch rails available for theft prevention, backed by over 30 years of retail fit-out experience and more than 1.3 million products sold. Get started with Store Fittings Direct and get your trolley fleet under control.
Frequently Asked Questions
Do I need planning permission to install shopping trolley bays?
Many trolley bays and shelters fall under permitted development, but this depends on size, height, position and whether the site is listed or in a conservation area. Check with your local planning authority before ordering. Shelters fixed permanently to the ground and structures over a certain footprint often need a formal application. Keep drawings of the proposed bay position and dimensions ready, as councils usually ask for them when assessing whether the installation affects parking provision or pedestrian routes.
What is the best surface for installing a trolley bay?
Concrete or a properly compacted tarmac base gives the most reliable fixing. Concrete slabs at least 100mm thick hold expansion bolts securely and resist the sideways force of trolleys being pushed in and out. Block paving can work if the sub-base is solid, but loose gravel or bare soil will let the shelter shift over time. Whatever surface you use, it needs to drain well so water does not pool around the base and speed up corrosion.
How do you secure trolley bays to stop them moving?
Ground fixing is what stops movement. Expansion bolts into concrete, chemical anchors for cracked or older slabs, and ground screws for softer surfaces all work, and the choice depends on your base. Add bollards at the corners and entry points to absorb impact from vehicles and trolley trains. For extra security, hitch rails inside the bay keep trolleys locked together overnight, which also cuts theft. Check fixings again after the first few weeks, as new installations can settle.
How much space should be allocated for a standard trolley bay?
Allow roughly 1 metre of width per trolley, plus clearance at each end for pushing in and pulling out. A typical supermarket bay holding 20 to 30 trolleys needs around 25 to 35 metres of run, depending on trolley size. Leave at least 1.2 metres of walkway in front so pedestrians are not squeezed against traffic. Measure your largest trolley first, since compact and standard models differ, then add a little extra so the bay does not look crammed.


